Monday, January 30, 2012

So ready for summer...

I know, I know, it isn't even February, but I am already SO ready for summer.  I can't wait to be back in the house, lay on the dock, eat taco house on the patio, and enjoy the beautiful sunsets (like the one below!) from outside and not inside!  I am ready to enjoy some more beautiful flowers, like this lone lilly I discovered on our bank last summer.


Monday, January 23, 2012

Is anyone there?!

We love hearing feedback on the blog, so leave a comment now and then!  We like knowing that people other than just the 2 of us are reading this, and would love to hear some feedback on the process and decisions we make!  =)

Vacation is a good thing!

We were gone on vacation to New Orleans for a wedding for about 6 days.  While gone, Brian & Jason got SO much done.  We were thrilled when we came home and saw all of the changes--it was like we were young children on Christmas morning--soooo exciting.  We didn't talk to them much while gone, so we really had no idea what to expect when we got home as far as what they were working on while we were gone.  Rather than type a long essay, I'm going to just put up a ton of photos of the progress.  Cheers to our progress and the fact that this blog is finally UP TO DATE!!!
Closet organizers!  Can't wait to fill this up!
Other side of closet
Oh, hey laundry chute!! How convenient that our closet is directly above the laundry room! I love this!
Just a better pic of colors in the master bedroom 
A view from the top of the stairs into the living room.
Tiled master bath shower!
Hopefully this will be a good enough shower head panel for Michael.  
Living room view from the front door.
Living room from view the 'lake' side looking toward the front door/fireplace.

Kitchen with range, hood, sink, and dishwasher!!  Oh, and Michael looking good in his work shirt! :) 

Sweet range, hood, and stainless steel farmhouse sink!
Laundry room cabinets
Kitchen view from sink (that's the butcher block top they are making for our island)
Island top being made!
View coming up the stairs from the kitchen to the living room.  

Cabinets!

We have cabinets installed in the kitchen!  Wahoo!  Maywood is really starting to look like a HOME!  Painting the cabinets was a big project, and I give almost all the credit to Michael.  We painted all the cabinets for the kitchen and laundry room.  Michael worked so hard on getting them done before we went to New Orleans while I was a work.  I was able to help with the first coat on the lower cabinets, but he did all of the second coats and all of the upper cabinets.  We were so surprised by how many cabinets we actually have.  Our kitchen seems so much bigger than before!  We painted in his parent's garage.  It was a stinky process, but nothing compared to the scent of the stain we used to stain the wood for the living room ceiling.  I would say one of the worst smells  is the "gas heater" smell that is put off of the garage heater we installed.  Its been super disappointing to us that it smells so bad.  When we were in New Orleans we were reminded of the smell everyday because it has soaked int our clothes and personal items.   Nothing like a constant silent reminder of the 'to do' list everyday on vacation!  I apologize to Jim and Diana now--I hope the smell is gone by April when you come home!  Then again, you are in  FLORIDA all winter, so can I really feel that bad???  Ha!  Yes, of course I do feel bad!
Back to the cabinets!  We used an oil based paint for the lower cabinets (they weren't able to make the upper cabinet color in oil based paint) because it is so strong as far as paint goes.  We were hoping to use a smaller, fine-finish sprayer to paint the cabinets so the process would go a little quicker.  Unfortunately, we weren't able to get the oil based paint to the right consistency to use it.  It either wasn't smooth or we could see the sheen of the paint thinner through the paint.  So, we used an old fashioned roller and brush.
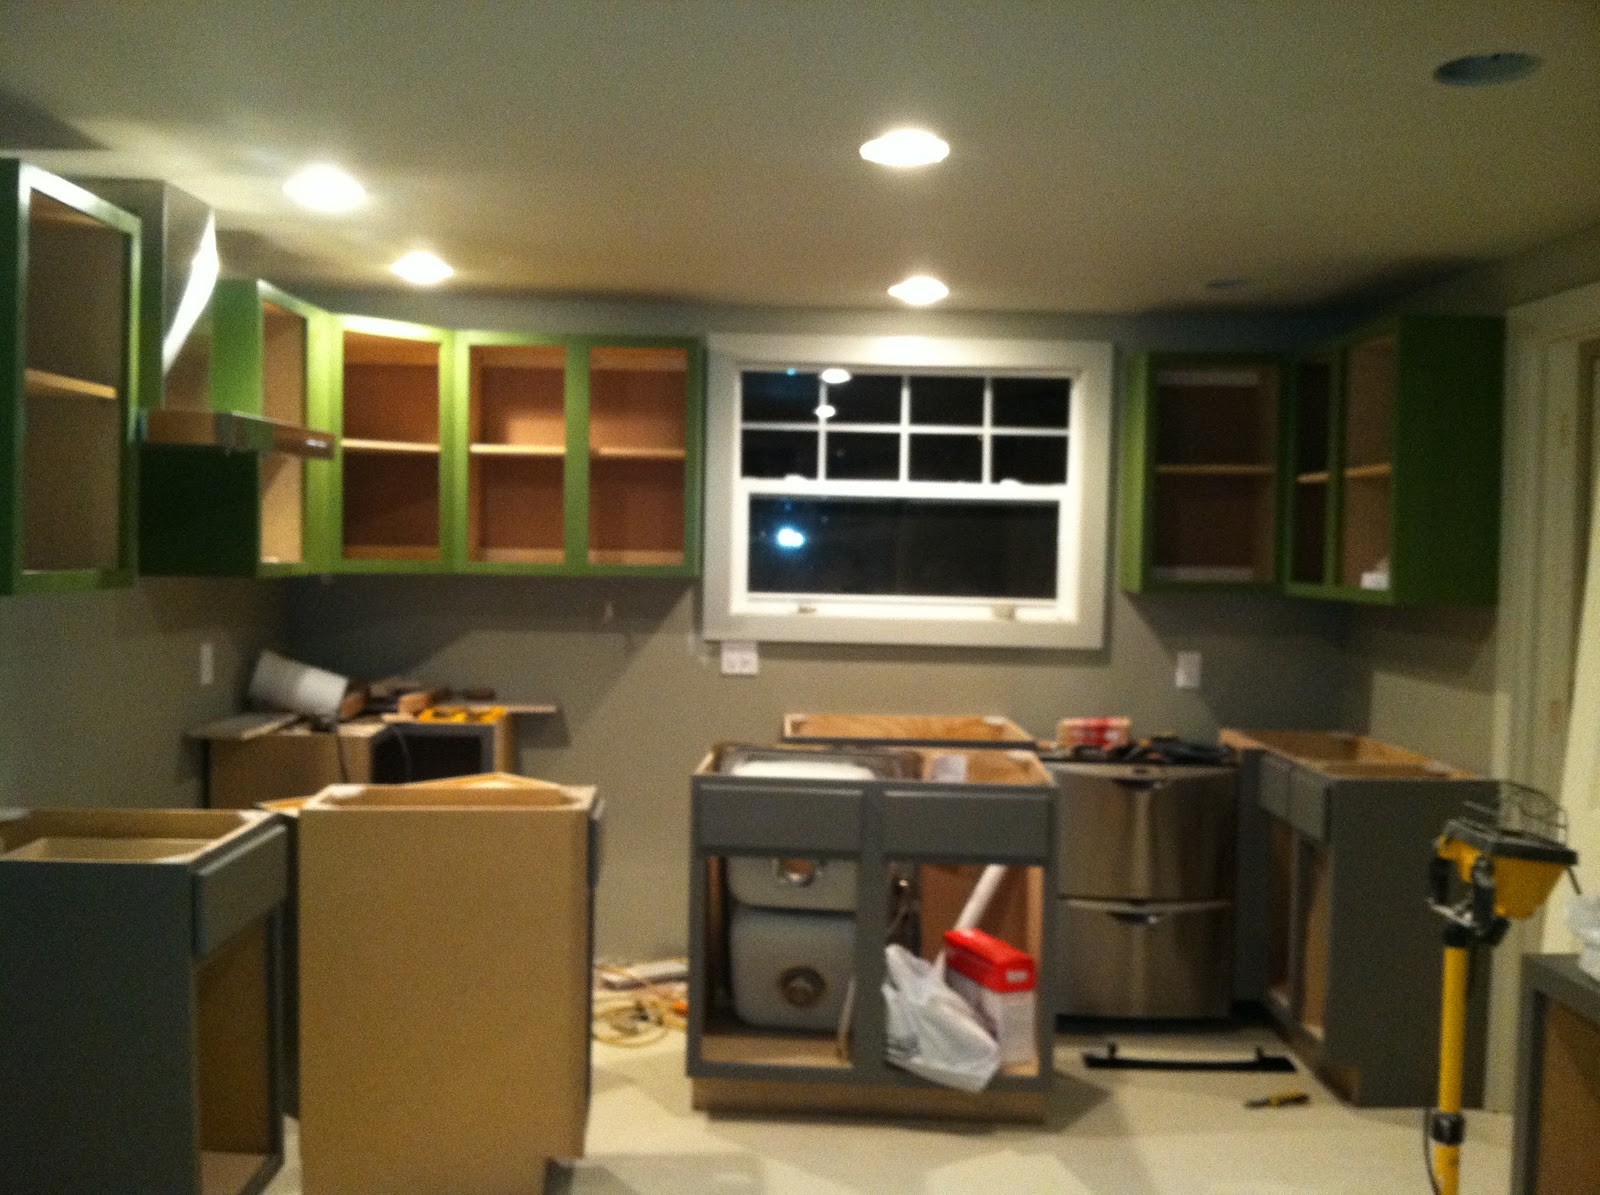
When choosing the colors of the cabinets we wanted to do something fun and unexpected.  We loved the idea of paying a tribute to the classic Okoboji cottage in our kitchen.  So, we decide to add some COLOR to our upper cabinets.  For those who know us really well, you know this is a BIG step out of our comfort zone--especially Michaels.  We chose the colors 'gauntlet gray' for the lowers and 'garden spot' for the uppers.  Our official opinion now that they are painted:  they look SWEET.  Well, we think they do!  It looks especially awesome with the 'way too nice for Kira & Michael' appliances we got.  All the appliances are used (classic Michael!), but everyone we know who actually cooks says they are the bomb.  I can't wait for people to come cook us some meals using them!  Because of this we drove to Omaha to get the range, Cedar Rapids (thanks Dan for picking it up!!) to get the dishwasher, and Spencer for the fridge (which we don't have just yet).  Talk about not shopping local...oops!  Ok, enough babbling, I know you are excited to see pics, and I'm sooo excited to share, so here you go!  Let us know what you think!    


Gauntlet gray and Garden Spot!

Michael's ergonomic work station!

Yay! Yay! Yay!  

Saturday, January 14, 2012

Leave it to me...

Of course if anyone were to get hurt on the project, it would be me!  Michael and I had a crazy few nights of painting the house when the fall happened.  I had just finished painting one of the closet walls and was moving the ladder, paint tray, and myself to the next section.  I'm not even sure how or what happened, but somehow I managed to get my clumsy self tangled up in the ladder.  Knowing I was going to fall, I took a split second and decided I WOULD NOT fall into the wall I had just got done painting.  Looking back, I should have--the landing would have been softer and touching up or repainting the wall really wouldn't have taken much time.  I hurt my knee (which, I'm still complaining about...) and also had the ladder fall on me.  BIG kudos to Michael for not instantly laughing me.  He was able to hold off the laughter once he knew I was alive and not crying.  Also, a big kudos to Michael's mom for relentlessly trying to convince Michael that the only thing that could possibly make me 'better' would be a shopping spree.  
Although I didn't get a shopping spree out of the deal, I did get a scar that will always be a reminder of the project and a HUGE bowl of ice cream.  Ice cream makes everything better!   We of course had to reinact the fall for everyone--enjoy!
Aaaand I'm down...
So sad...I even ripped my jeans!

Up close and personal--not looking so bad, YET!


Thursday, January 12, 2012

Tile Clad

Before cabinets were installed we wanted to get the tile in the kitchen and bathroom painted.  We didn't like the color of the red/rusty/orange tile that was already in place, but knew it would be a bigger than normal project to replace that tile.  Inevitably we would have had to replace the floor underneath, and so on and so forth.  After much research we decided to try painting the tile.  Now, I'm sure you're all thinking the same thing we have heard from almost everyone so far "Wait, what? You can paint the tile? Won't it chip?"  NOPE!!  All of the reading we did talked about using a high quality epoxy to prevent chipping.  The process was going to be long and strenuous.  First we had to aggressively scrub, roughen up, and clean the tile.  Next we were going to have to prime it, followed by a couple coats of paint and epoxy.  Not only was this going to be a ton of work, but we were also going to have to wait between coats for drying times.  Some of you might be wondering why we would go through that much work rather than just replace the tile.  We figured that we would save close to $1000 in time and materials by painting it. That's a good enough reason for us to put in some time and elbow grease to paint the floor!
Luckily, before starting this process, Michael was able to talk with the guys as Sherwin Williams and we were introduced to a product called "Tile Clad."
This product is AMAZING.  It can be tinted to the color we want the floor to be ('universal khaki') and it only takes a good cleaning and ONE coat of the tile clad.  Just like that, it's done.  Once it is applied the floor can't be walked on for 72 hours.  If anyone uses this, be sure to have some good ventilation in place.  According to Michael (I was at work when it was applied) it is VERY potent and will make you rather hiiiiiigh.  You will also want a roller pad that is for high solvent products so that it isn't pulled apart during application.  The only bummer is that our Sherwin Williams only had the product available in semi-gloss.  The floor looks so much better than before, but it looks constantly wet.  So, while we were in Minneapolis today we were able to go to a commercial Sherwin Williams and get the product in an eggshell finish.  So, this weekend (while I'm at work again...) Michael will re-coat the floor with the eggshell finish.  Another great thing about this product?  It can be used on wood!  Our floor in the laundry room, which is connected to the kitchen, is pine wood.  We planned all along to paint the wood and are super excited to be able to use such a tough product on wood.  Here are some pics before and after the semi-gloss universal khaki tile clad was applied.


Sweet beams!

When we first started destruction in the house we found that the ceiling in the office/guest bedroom was actually vaulted.  Score!!!  We have obviously left it this way, and wanted to have a statement  feature to the room.  We decided to have beams put up with the wood from the trees we had to cut down for the garage.  First just horizontal beams were put up by Brian.  We were thrilled with them!  We liked the 'rustic' look of them and decided not to stain or treat the wood, but leave it with all the markings and in its natural state.  We did have him change them from a horizontal beams to trusses to add more architectural interest.
Horizontal beams day 1

Wah-la!  Trusses! 

Ceiling update

The ceiling is up and done except for a little bit of trim in a few spots.  Here are a few pics of the completed ceiling.  Sorry for the crappy quality--I guess a phone camera isn't the best at night!  I will get some good pics of all the progress soon!
The addition half of the living room.  The ceiling is much more gray and much less dark in "real" life.

A little bit fuzzy, but the left is the addition and the right it the  existing living room ceiling.

At the top of the stairs looking into the living room.

Sunday, January 1, 2012

The ceiling

I have a few pics of the ceiling as it was being installed.  I will get a good pic of the ceiling once it is done with all the trim up and everything when we get to that point.  But for now, here's some pics to get an idea of how it looks (totally awesome, in our opinions)!  Also check out the painted wood car siding on the walls in the pics!


Stained ceiling

The sheetrock was hung, taped, and textured, and we were ready to start working on different parts of the house.  We are really starting to see changes.   How exciting!  All of the rooms were sheetrocked except for the living room.  These walls are covered with car siding wood, which has been painted.  The ceiling in the living room is the focal point.  It has a very high vaulted ceiling in the old part and the new addition.  We decided it would be pretty cool to have a stained wood ceiling.  We wanted to have wide planks for the ceiling--about the same width as a dock plank (10 inches).  Unfortunately the stain we picked out looked best on birch wood, which is not cheap.  For everyone who knows Michael, you know he will get the nicest thing at the cheapest price, so we had to get creative to get the ceiling we wanted.  So, what did we do?  We bought birch plywood and had Brian & Jason cut it into 10in. wide pieces.  It looks great and was much more affordable.  You can't tell it is plywood at all.  
We had to prime all of the wood first with a conditioner, and then were able to put only one coat of stain on each piece.  It was a long process, but with help from my mom and Michael's dad we were able to finish in 2 nights.  Thanks guys!   It was a very smelly process, and had we all not gotten high and head aches the first night, we probably would have finished faster.  We completed all of this in Michael's parents house and not only stunk up the garage, but also their house.  Sorry!  It was freezing outside, so we couldn't open the doors to air it out for very long because we had to keep the warmth in so it would set up and stain properly.  We also were able to borrow some drying rack and sawhorses from other family to help with the drying/staining process.  Thanks to those family members for loaning the equipment!  I think in total we stained approximately 140 boards.  
The conditioner drying on some of the boards.

These are done being stained and are up to dry.

Finished product of night #1

Michael installed a gas heater to help keep the garage warm.  Good work! 

Pile to condition & stain on night #2

I do all the heavy lifting in this relationship! Ha!  
Sidenote: We are both dressed up in our pics because on night 2 we went out for Michael's office Christmas party and then bolted straight to Menards before they closed to get a heater.  We got home, installed the heater, and stacked boards from night #1 before changing into work clothes to start night #2.  Weirdos!